SOLVING THE RUBIK'S CUBE - first stage
Introduction
It may be helpful to watch a short video (about 12 minutes) to get a better understanding of what would be covered in one of our free workshops to get a better understanding of the process, which is described in the following web pages.
Completing the Rubik’s Cube is like building a house. You start with the foundation and then build the floor level and finally the roof.
Use the cube’s white face as the foundation and the yellow as the roof.
The TOP TWO LAYERS are VISUAL - JUST FOLLOW the RULES [you watch the blocks going into place]
Layer THREE is MEMORISING the ROTATION of the CUBE [called ALGORITHIMS]
The house is built in stages: The first layer (foundation) must be complete before you build the second layer and then the third (the roof). Whilst doing that, it is just a matter of remembering a “general maintenance” process to restore the layers while putting on the roof.
The algorithms only come into play after you have built the first and second layer and don’t want to disturb what you have done. That is, after moving the blocks around to build the roof you want to restore the lower layers to their original position.
The algorithms simply record a sequence for rotation. That is the part of the building process that must be memorised. The earlier build stages are just following rules to position blocks.
There are only FOUR algorithms to memorise and are explained further on.
Terms Used
For reference purposes, consider each side colour of the Rubik’s Cube as a “family”. When the “family” block is facing you consider the colours on the adjacent sides as “cousins”. This simple approach will help describe the rotation direction of the cube.
General
Only the sides rotate: The centre blocks remain constant. That is white will always be opposite yellow, green opposite blue, etc.
Always hold the cube in a consistent position. Don’t keep changing it unnecessarily during the construction stage.
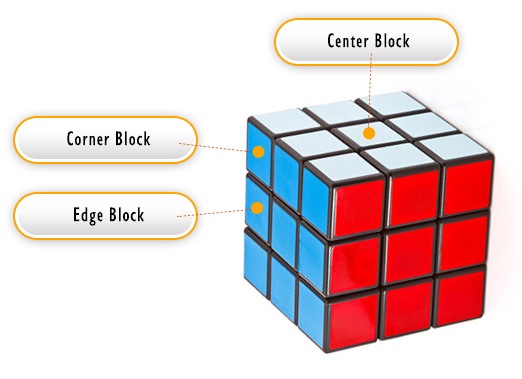
About the Rubik’s Cube Layers
The white layer will ultimately become the foundation layer and move to the bottom but, to start, hold the cube facing you with the white Centre Block at the top. There will be edges and corners around the white centre piece to be put in place, as shown in the diagram below.
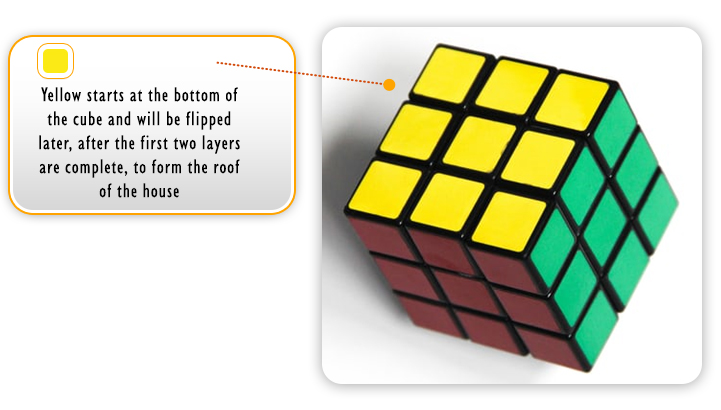
The cube will be flipped later to have the white face (representing the foundation layer) at the bottom and the yellow face (representing the roof of the house) at the top.
The VISUAL BUILD PROCESS - FOLLOW THE RULES

Position Edges
[Rubeit Relay Team Member ONE]
Set up EDGES to form a cross at the top, in white.
To do this position the white edges at the bottom of the cube to start.
Then line the edge up with the “family” colour in the level above (level two).
Rotate the side face containing the “family” aligned edges to bring the white edge to the top (shown in the diagram above). Do that for the four white edges.
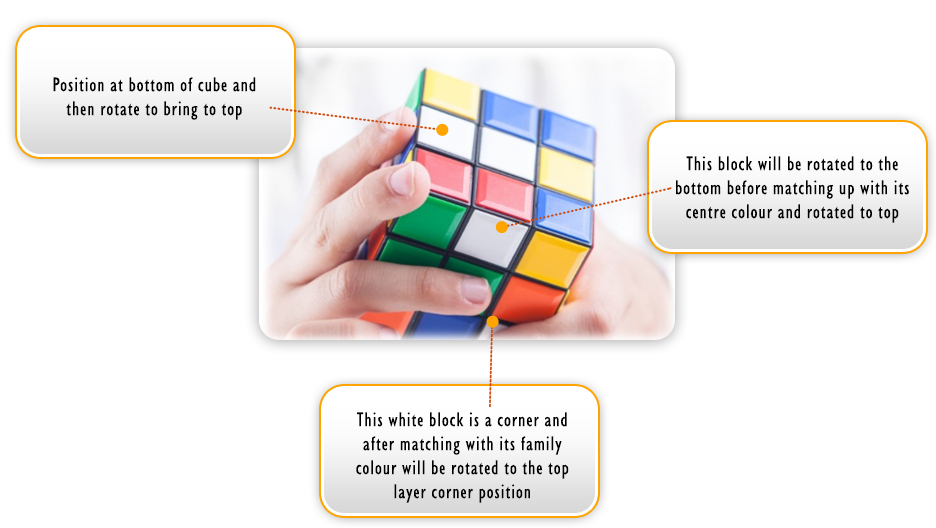
Position Corners
Now for the CORNERS. Position the white corners facing you on the side and in the third or bottom layer. If the corners are underneath or in the top layer twist the cube until they appear on the side and down at the third layer.
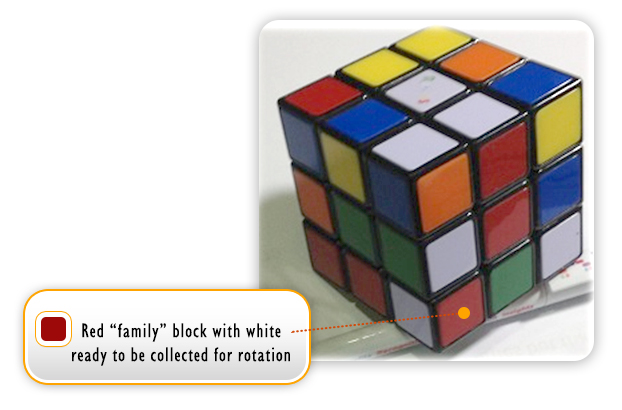
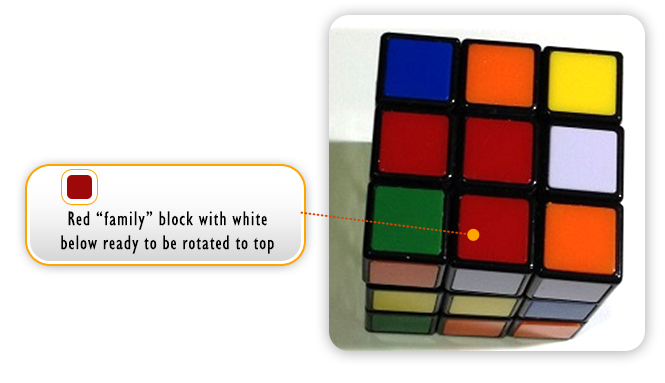
Match the non-white side of the corner block (facing you) with their “family” by rotating the layer until it matches. It is now ready to go up to the top layer. Here is how:
- Rotate the block away from the “family” but keep the cube facing you.
- Now rotate the “family” facing side down to collect the corner block we just moved away from the “family”.
- We can now move the third layer back containing the white block to where it came from to be collected and uploaded as the corner piece.
- Rotate the “family” side facing you up to the top again.
It is easy to remember if you keep in mind the white edges should start at the very bottom of the cube and the white corner blocks start at the third layer facing you. It is simply a matter of rotation to get them in the right place.
The corner piece should now take its rightful place in the top layer. Repeat this process for all four corners, each time positioning the corner in the third or lower layer before rotating it to the top.
The process to remember is away, down, back to collect and restore.
We should now have the white blocks of the cube in position at the top of the cube with all sides matching the centre piece in Layer Two.
This process is going to be repeated in the next step to restore the top layer, after we disturb it.

Remove Yellow Blocks from theMiddle Layer
[Rubeit Relay Team Member TWO]
You will notice the Edges for the top Layer are aligned with the centre “family” colour on the second layer, but some of the edges on the side of the second layer are probably in the wrong place. They need to be fixed.
Note: There are no corners in the second layer.
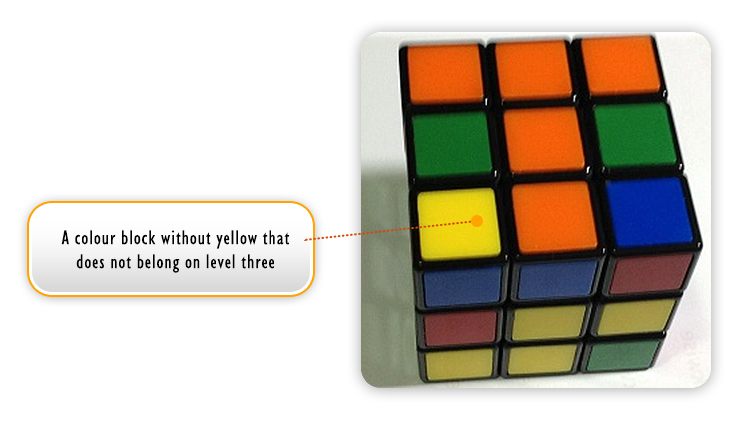
Any edges with yellow in them do not belong in the second layer and similarly any edges on the third layer without yellow are in the wrong place.
To fix this we are going to disturb the corners in the top layer that we already fixed. Unfortunate, but that is the way it works. Just remember how we got the corners into position by rotation before, because that is how we are going to get them back into position this time. Let’s call that “general maintenance” and will be repeated from time to time.
Here we go to fix the second layer:
- Find the edge blocks without yellow on the third or bottom layer and rotate the layer around until they join up with their “family’s” centre block colour in layer two.
- Keep the cube with the matched up “family” colour facing you now as you do this next process.
- Under the block in the third layer that you just rotated to line up with its “family” member, will be another colour. Let’s call that its “cousin”. The cube will have a block the same colour as its “cousin” on one of its sides.
- Now, rotate the bottom layer (keeping the cube facing you) AWAY from its “cousin” on one of the sides.
- Now the side of the cube that contains the “cousin” block will be rotated clockwise down and disturb the top layer.
- Now rotate the bottom layer back so the edge piece we started with joins up with the “family” colour.
- Now rotate the side of the cube we brought down, back up to the top from where it came.
- Time for “general maintenance” to restore the top layer.
Repeat the process until all the blocks in the middle layer are in place.
It is very simple if you consider we are just doing an away, down and back process. We are just using the “family” analogy to illustrate what direction the away and back should take.
We now have levels one and two in place.
This is now the start point for ALGORITHMS